01Jun 2026
table of contents
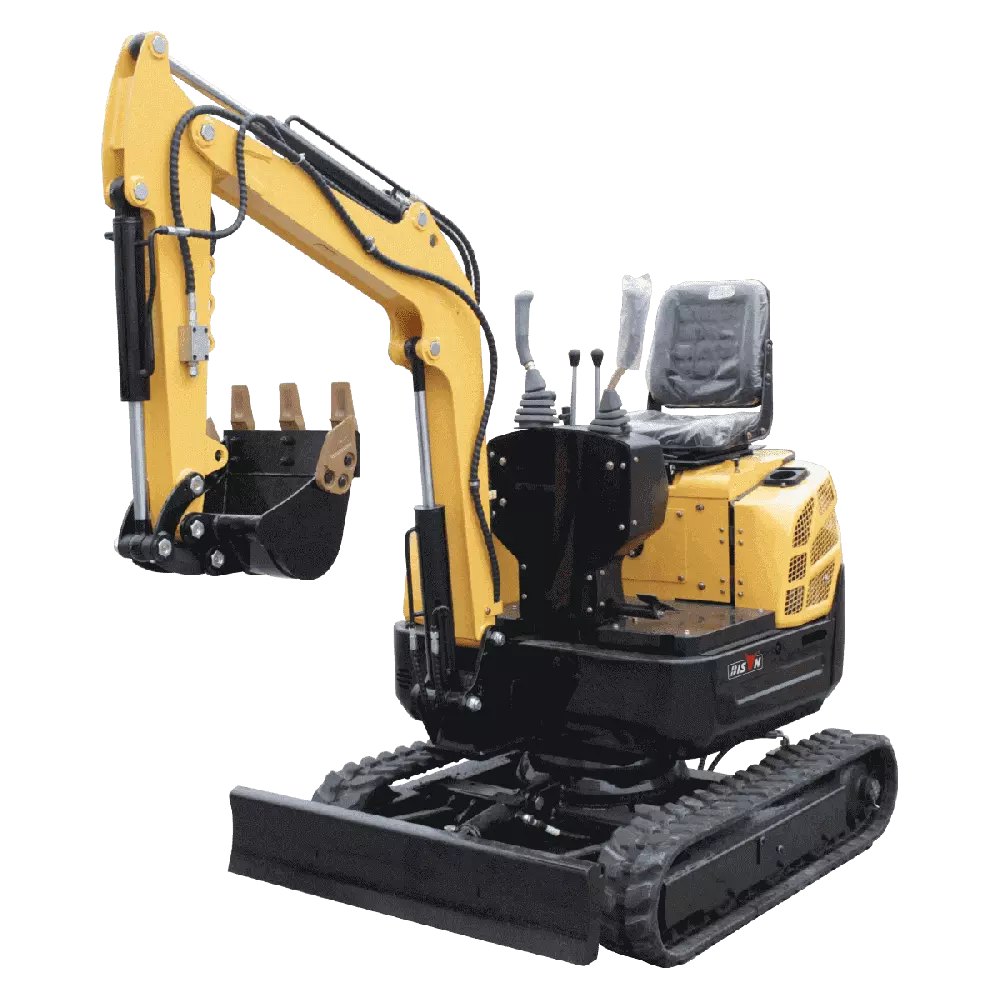
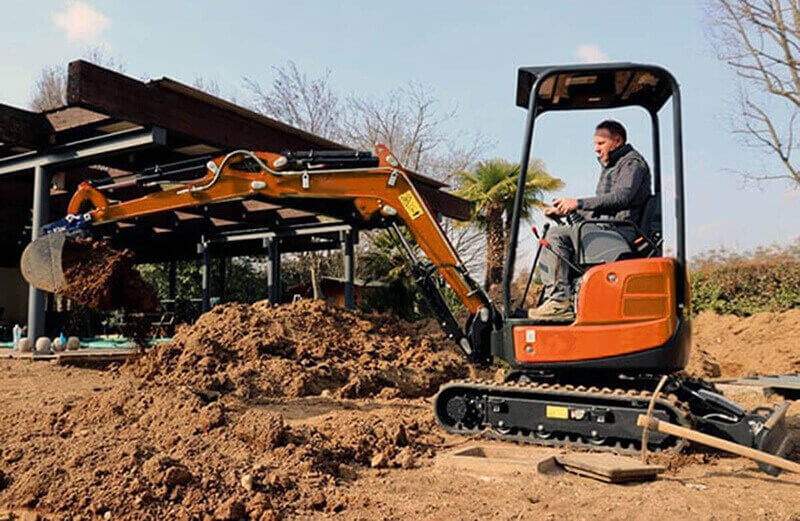
Versatility is the key strength of a mini excavator, allowing it to switch between different attachments quickly and easily. The bucket is the most frequently changed attachment, making proper replacement an essential skill for any operator. This guide provides a clear, step-by-step explanation suitable for all skill levels to help you complete the process with confidence and efficiency.
There are two main methods for changing a mini excavator bucket: the traditional manual pin-on method and the modern quick coupler system. Each method offers different levels of speed and convenience depending on the equipment setup and job requirements. Understanding and applying the correct method helps improve productivity and allows the machine to adapt to various tasks.
As a professional excavator manufacturer, BISON focuses on delivering reliable machines designed for flexibility and ease of use. Safety should always come first, and proper procedures must be followed throughout the entire bucket changing process.
Small excavator buckets are designed to handle a variety of soils, terrain, and tasks, making it important to choose the right one for each job. Using the wrong bucket can reduce efficiency, increase wear, and potentially damage the machine. Mini excavator buckets come in different types, each suited for specific tasks such as digging, trenching, grading, and ditch cleaning, helping improve efficiency, accuracy, and overall job performance on the worksite.
Bucket design directly affects performance. Teeth improve penetration in hard materials, while smooth edges enhance finishing quality. Width, shape, and edge design influence material handling capacity and precision, affecting overall efficiency on the job.
Standard excavator buckets are the most commonly used type on mini excavators and are designed for general-purpose excavation and soil removal. Built with a strong structure and sharp teeth, Their shape allows them to handle a wide range of materials, from loose soil to compacted dirt.
Trenching buckets are narrower than standard buckets, making them ideal for digging precise trenches for pipes, cables, or drainage systems. Their slim design allows better control in confined spaces and ensures accurate trench width and depth.
Grading buckets are broader and flatter, designed for leveling surfaces, backfilling trenches, and shaping slopes. The flat edge allows operators to move soil evenly, reducing the need for additional tools or manual labor.
Specialty buckets include rock buckets, tilt buckets, and clamshell buckets, each designed for specific applications. Rock buckets are reinforced for heavy materials, tilt buckets allow angled digging, and clamshell buckets are used for lifting and moving loose materials.
Selecting the correct bucket is essential for maximizing productivity, improving efficiency, and ensuring high-quality results. And the right bucket reduces machine strain, speeds up operations, and helps extend equipment longevity.
Changing a mini excavator bucket requires the right tools and equipment to ensure the process is safe, smooth, and efficient. The required tools may vary depending on whether the machine uses a manual pin-on system or a quick coupler system. Proper preparation is essential to ensure safety, efficiency, and to prevent damage to the machine or attachment points.
For manual pin-on systems, the commonly required tools include:
Wrenches and ratchets: Used to loosen and tighten bolts or fasteners that secure the bucket pins.
Breaker bar: Provides extra leverage for loosening tight or rusted components.
Hammer or mallet: Used to gently tap pins loose or align components during installation. Controlled force helps avoid damaging the bucket or attachment points, and a soft-faced hammer is preferred to prevent surface marks.
Pin punch or hydraulic pin remover: Used to drive out or remove stubborn pins that cannot be taken out by hand, especially when dealing with tight or worn components.
Grease gun: Applies lubrication to pins and bushings to reduce friction and prevent wear.
Lubricant or penetrating oil: Helps loosen rusted or stuck pins and reduces friction, making removal smoother and preventing damage.
Cleaning rags: Used to remove dirt, debris, and old grease from connection points before installation.
For quick coupler systems, fewer tools are typically required:
Coupler key or tool: Used to lock and unlock the quick coupler mechanism depending on the system design.
Grease gun: Used to maintain proper lubrication of moving parts and ensure smooth operation.
Additional optional equipment includes:
Lifting straps or chains: Assist in handling heavier buckets for better control during attachment or removal.
Hoist or lifting device: Provides additional lifting support, especially for larger buckets or solo operation.
Support blocks or stands: Used to stabilize the bucket after detachment, preventing tipping and making alignment easier during installation.
Using the correct tools and equipment helps ensure safe and efficient bucket changes while protecting both the operator and the machine.
Mini excavators typically use one of two connection systems for attaching buckets: manual pin-on systems or quick coupler systems. Understanding the differences between these methods helps operators choose the right approach based on work requirements, time constraints, and equipment setup.
Manual pin-on systems use steel pins to physically secure the bucket to the excavator's arm and linkage. To change the bucket, the operator must remove the retaining pins, detach the current bucket, align the replacement bucket, and reinsert the pins to secure it in place.
Advantages
Simplicity: The system has a straightforward design with fewer components, making it easy to understand and operate.
Durability: With fewer moving parts, manual pin-on systems are generally robust and less prone to mechanical failure.
Disadvantages
Time-consuming: Bucket changes require manual effort and multiple steps, which can slow down operations.
Labor-intensive: Tools and physical handling are often required, making the process more tiring and less efficient when switching attachments frequently.
Quick coupler systems allow operators to change buckets quickly without manually removing pins. These systems include hydraulic quick couplers, operated from inside the cab using hydraulic controls, and mechanical quick couplers, which require manual locking and unlocking but still reduce direct handling of pins.
Advantages
Speed: Bucket changes can be completed in seconds or minutes, significantly reducing downtime.
Efficiency: Operators can switch between attachments quickly, improving productivity on jobs that require multiple tools.
Disadvantages
Complexity: These systems have more moving parts, especially hydraulic versions.
Maintenance requirements: Regular inspection, lubrication, and upkeep are necessary to ensure safe and reliable operation over time.
Safety is the most critical aspect when changing a mini excavator bucket. Because mini excavators are powerful machines, incorrect operation can result in serious injury or equipment damage. Following proper precautions ensures the process is controlled and safe.
Wear personal protective equipment (PPE): Use heavy-duty gloves, steel-toed boots, and safety glasses to protect against injuries. Gloves help prevent cuts and pinch injuries, while boots protect feet from falling buckets or tools during handling.
Positioning and preparation
Proper positioning of the mini excavator is essential before removing the bucket, as correct alignment reduces stress on the boom, arm, and hydraulic system and ensures safe pin removal.
Park on a level surface: Always park the excavator on flat, stable ground before removing the bucket. Uneven surfaces increase the risk of tipping, especially when the attachment is detached. A level surface provides stability and reduces accident risk throughout the process. Even on a level surface, use track blocks to prevent any micro-movement.
Adjust the position of the boom and bucket: Extend the boom and stick, then lower them until the bucket lands smoothly and gently on the ground. The bucket must remain stable but cannot bear the full weight of the machine; excessive downward pressure can cause the connecting pins to seize, making them extremely difficult to remove.
Additional preparation include following the operator's manual at all times, and clearing the work area of people, tools, and obstacles to maintain a safe workspace.
Releasing hydraulic pressure
Releasing hydraulic pressure is a crucial step when changing a mini excavator bucket, especially for machines with a hydraulic quick coupler. Residual pressure can make pin removal difficult or cause unexpected bucket movement.
Operate the bucket controls after shutting off the engine: After shutting off the engine, gently move the bucket controls back and forth to release any remaining hydraulic pressure. This allows the fluid to settle and reduces the tension in the lines, making it safer to remove the pins or disconnect the couplers.
Loosen the hydraulic connections if necessary: In some cases, loosen the hydraulic lines connected to the quick coupler slightly. This should be done carefully, following the manufacturer's instructions. Avoid completely disconnecting the lines unless explicitly permitted by the manual, as this may cause leaks or allow air to enter the system.
Check for hydraulic leaks: Before proceeding with bucket removal, inspect all hydraulic connections and couplers for leaks. Any leaks may indicate residual pressure or damaged lines, which can be dangerous if ignored. Correcting leaks in advance ensures that the bucket replacement process is safe.
Ensure all safety precautions are followed, the work area is clear, and all necessary tools are ready before proceeding.
Removing the old bucket requires careful attention to detail and proper handling. Rushing the process can damage the pins, couplers, or bucket.
For manual pin-on systems
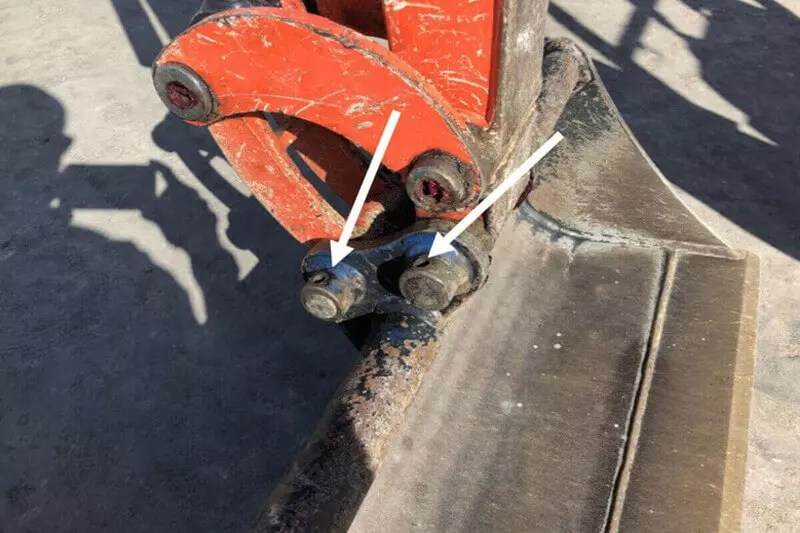
Use appropriate tools such as wrenches, a hammer, or a pin punch to remove any retaining hardware, then carefully drive out the bucket pins connecting the bucket to the linkage. If the pins are tight or rusted, apply penetrating oil and wait a few minutes before gently tapping them out. Avoid forcing or pulling the pins abruptly to prevent damage.
Support the bucket using sturdy blocks or stands before removing the pins. Proper support prevents the bucket from shifting, tipping, or dropping once the pins are removed and also helps with easier alignment during installation.
Once both pins are removed, slowly detach the bucket from the arm and set it aside safely. Keep hands and feet clear during removal, and avoid forcing the bucket off to prevent bending the pins or damaging the coupler.
For quick coupler systems
Operate the coupler control (hydraulic) or use the coupler key/tool (mechanical) to unlock the attachment.
Ensure the coupler is fully disengaged from the bucket hooks or pins.
Slowly lower or tilt the arm to separate the coupler from the bucket.
Move the machine slightly if needed to fully clear the bucket from the coupler.
If the bucket is large or heavy, use mechanical assistance or additional help to guide it safely. Never attempt to lift or move a heavy bucket alone, as this increases the risk of injury or dropping the bucket.
Before attaching a new bucket, inspect the excavator arm, coupler, and pins for wear or damage. Neglecting this step can lead to operational problems or safety hazards.
Check for bent or worn pins: Pins that are bent, worn, or elongated can cause the bucket to wobble during operation, lead to unsafe operation and increased wear on the excavator arm. Carefully inspect each pin and replace any that show signs of wear.
Inspect the coupler and arm: Check the attachment points on the excavator arm and coupler for cracks, deformation, or excessive wear. Even small cracks can grow over time and may lead to failure under strain. Ensure all surfaces are smooth and free from dents or damage.
Clean debris and rust: Remove dirt, mud, rust, or debris from pin holes and attachment areas, as buildup can prevent proper pin insertion or cause misalignment. Use a wire brush or light lubricant to clean surfaces and ensure smooth installation and the pins can slide easily.
Handle heavy buckets with care – If the bucket is large or heavy, use mechanical assistance or additional help to guide it safely. Never attempt to lift or move a heavy bucket alone, as this increases the risk of injury or dropping the bucket.
Proper preparation of the new bucket is essential to ensure a smooth and safe installation. This step helps prevent misalignment and speeds up the attachment process.
Lubricate the pins and bushings: Apply a light coat of grease or lubricant to the pins, bushings, or coupler contact areas. This reduces friction during installation, prevents sticking, and helps extend the service life of both the bucket and pins. Avoid over-lubricating, as excess grease can attract dirt.
Check for compatibility – Verify that the bucket is compatible with your mini excavator model, as variations in pin diameter, width, or coupler design may exist between different buckets. Installing an incompatible bucket can damage the pins, coupler, or hydraulic system.
Attaching a new bucket requires precision and care to ensure it is securely connected to the excavator arm. Proper technique helps prevent damage to the bucket, pins, or coupler.
For manual pin-on systems
Lift the bucket slightly: Use the excavator boom to carefully lift the bucket off the ground and keeping it slightly elevated allows you to align the pin holes correctly without stressing the pins or attachment points.
Insert the front pin first: Align the pin hole on the front of the bucket with the corresponding hole on the arm or coupler, and gently slide the pin in. Make sure it fits easily and does not require excessive force, which can bend the pin or damage the metal surfaces. And secure the pins with the appropriate locking hardware, prevent movement during use.
For quick coupler systems
Position the coupler over the bucket's mounting points and engage the locking mechanism using hydraulic controls or the manual lock system. Ensure the coupler is fully engaged and properly secured according to the locking indicators before operating.
Testing a newly attached bucket ensures that it operates smoothly and safely before starting heavy work. Proper testing helps prevent accidents and identifies installation issues early.
Raising and lowering the bucket: Slowly raise and lower the bucket to check for smooth movement. Observe the pivot points and pin connections for any signs of misalignment or binding. Smooth operation indicates that the pins are correctly seated and the bucket is stable.
Tilt and swivel: Tilt the bucket forward and backward, if applicable, to simulate digging or grading movements. This helps confirm that the attachment moves freely and that no part of the bucket contacts the arm or coupler.
Inspect for unusual noises: Listen carefully for any unusual cracking, grinding, or knocking sounds during operation. These noises may indicate misaligned pins, worn bushings, or hydraulic issues. Addressing them promptly helps prevent further damage and ensures safe operation.
After changing a mini excavator bucket, proper maintenance is essential to ensure long-term optimal performance, reduce wear, and maintain safe operation. Extend the life of both the bucket and the machine while preventing unnecessary downtime, costly repairs.
Clean after each use: Remove dirt, mud, and debris from the bucket, pins, and connection points after each use. Accumulated material can cause rust, wear, and misalignment over time. Keeping components clean helps prevent corrosion, improves inspection visibility, and ensures proper fit when attaching or detaching buckets.
Inspect pins and bushings regularly: Check bucket pins, bushings, and coupler components for wear, damage, cracks, or looseness. Worn parts should be replaced immediately to avoid operational problems and prevent damage to the arm or bucket. Early detection helps maintain a secure and safe attachment.
Lubricate moving parts: Apply grease or a light lubricant to all moving parts, including pins, bushings, and coupler joints. Proper lubrication reduces friction, minimizes wear, and helps ensure smooth bucket movement while preventing corrosion.
Check for structural damage: Regularly inspect the bucket body for cracks, dents, or bent edges. Even minor damage can worsen over time, so repairs should be carried out promptly to maintain the bucket's structural integrity.
Store properly: When not in use, store buckets on a flat, stable surface in a dry and secure location. Avoid placing buckets directly on the ground for long periods when possible.
Following these maintenance practices helps maintain optimal performance, improve safety, and ensure your mini excavator remains reliable for a wide range of tasks.
Avoiding common mistakes when changing mini excavators helps ensure machine safety and prevent unnecessary wear and tear on the bucket.
Skipping essential safety steps such as turning off the engine or stabilizing the excavator can lead to accidents or injuries.
Forcing pins into place or attaching the bucket without proper alignment can bend pins, damage the coupler, or cause misalignment of the bucket.
Failing to release residual hydraulic pressure can make pin removal difficult and may cause sudden or unexpected bucket movement.
Not checking pins, bushings, or coupler wear can result in unsafe operation and lead to rapid equipment failure.
Even with proper procedures, operators may encounter issues when changing or attaching a mini excavator bucket. Understanding common problems, their causes, and solutions helps resolve them quickly and safely.
Possible causes: Misalignment between the bucket and linkage, worn pins or bushings, or debris blocking connection points.
Solutions: Reposition the bucket and ensure proper alignment before inserting pins or engaging the coupler. Clean all contact areas and inspect for wear. Replace damaged pins or bushings if necessary.
Possible causes: Dirt buildup, lack of lubrication, rust, or pins jammed due to wear or deformation.
Solutions: Apply penetrating oil and allow it to soak before removal. Use a pin punch, hammer, or breaker bar for additional leverage. Regular greasing helps prevent this issue.
Possible causes: Loose fittings, damaged hydraulic hoses, or worn seals in hydraulic quick couplers.
Solutions: Inspect hydraulic lines and fittings for visible leaks or damage. Tighten loose connections and replace worn or damaged components. Do not operate the machine until hydraulic issues are resolved to avoid further damage or safety risks.
Possible causes: Uneven ground, incorrect bucket positioning, or bent components in the linkage or coupler.
Solutions: Ensure the machine is on level ground and adjust the boom and arm slowly to achieve proper alignment. Use small machine movements to fine-tune positioning. Inspect components for damage if alignment problems continue.
Addressing these issues promptly helps maintain efficient operation, reduces downtime, and ensures the bucket is securely and safely attached before use.
Replace it when the edges or bucket body show significant wear or damage.
Changing a mini excavator bucket is a simple yet important task that requires proper preparation, the right tools, attention to detail, and strict attention to safety. By understanding the correct bucket change procedures — whether using a manual pin-on system or a quick coupler — operators can ensure secure installation and avoid unnecessary downtime or equipment damage. Performing regular inspections, and maintaining pins and attachments help ensure prevent damage, and extend the life of both the bucket and the excavator. Selecting the appropriate bucket for each job further improves productivity, accuracy, and overall worksite results.
inquiry form here
BISON BLOG, All the latest news and views from Bison Machinery.
what's hot?
Related Articles
mini excavator sizes: choosing the right size for your project how to change the bucket of a mini excavator large excavators vs mini excavators what equipment do you use for demolition? common questions about excavator hydraulic systemsRelated Products