03Mar 2026
table of contents
In construction projects, achieving a professional concrete finish is important because it combines strength with visual appeal. Floors in warehouses, garages, and industrial facilities need to be smooth, even, and durable to last longer and require less maintenance. Poorly finished concrete can crack, wear out faster, and cause ongoing problems. Using the right equipment is essential, and a power float is the key tool for creating a smooth, uniform, and professional concrete surface.
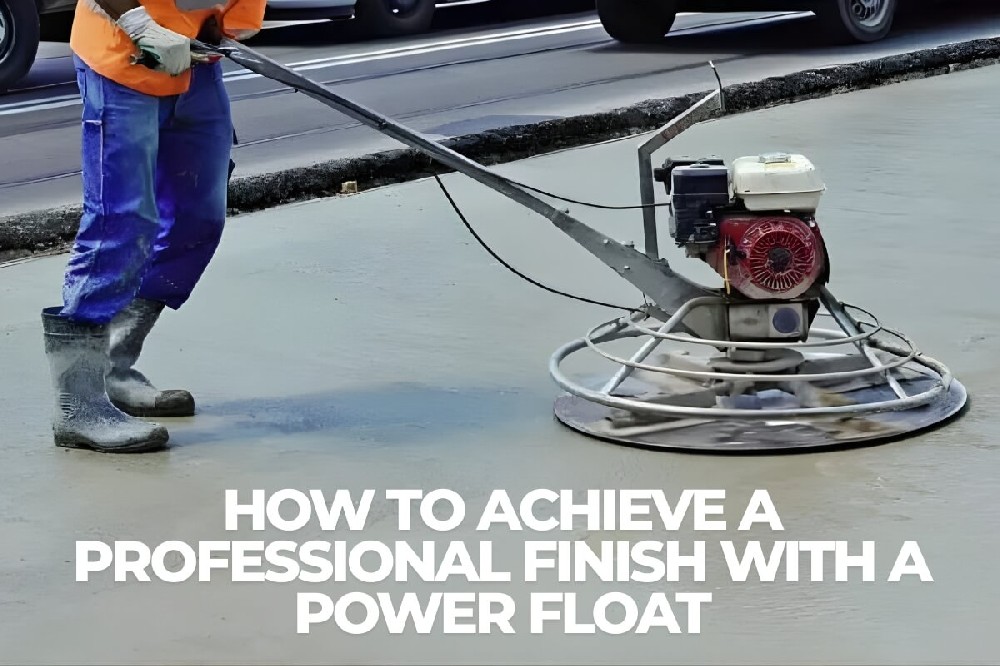
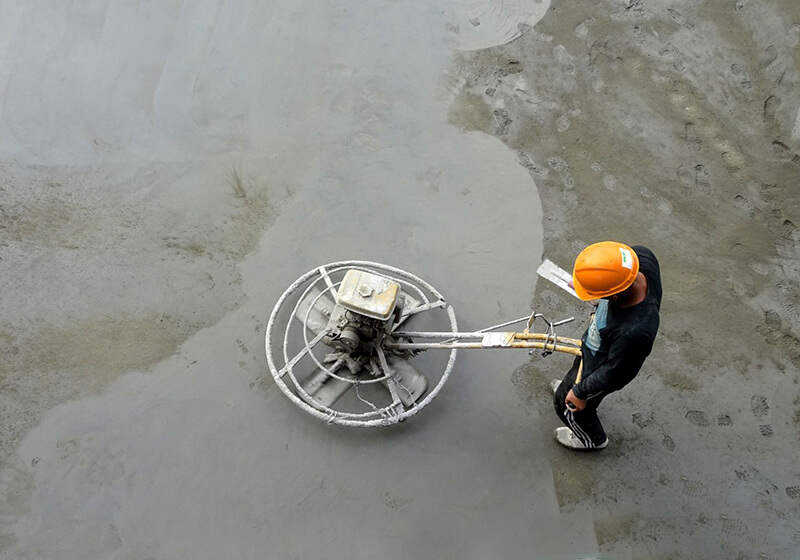
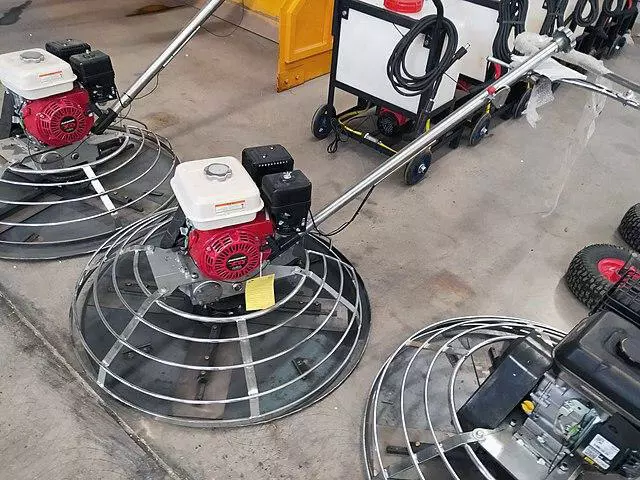
Power floating, also known as power troweling, is a method used to smooth and finish freshly poured concrete using a machine rather than manual tools. A power float uses rotating blades to move across the surface, creating a dense, even, and polished finish much faster than hand troweling. It works like a helicopter gliding over the concrete to deliver a professional result.
There are two main types of power floats:
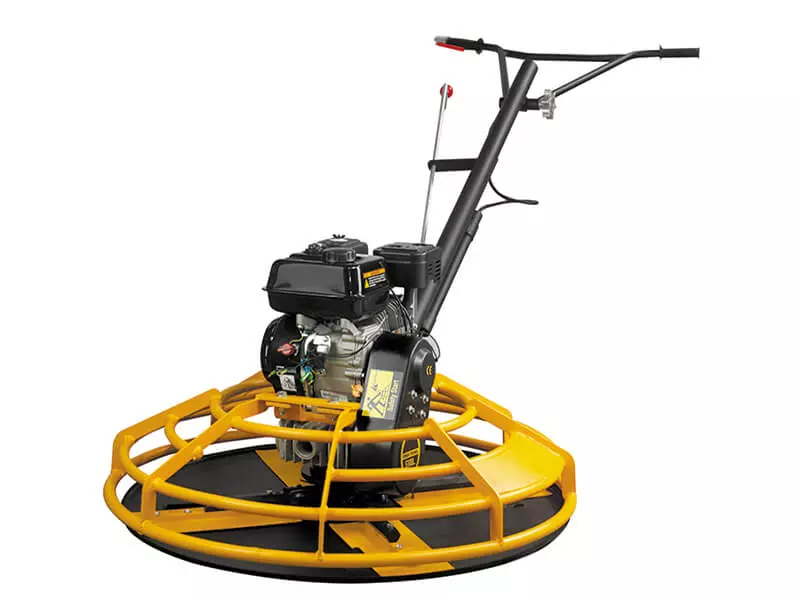
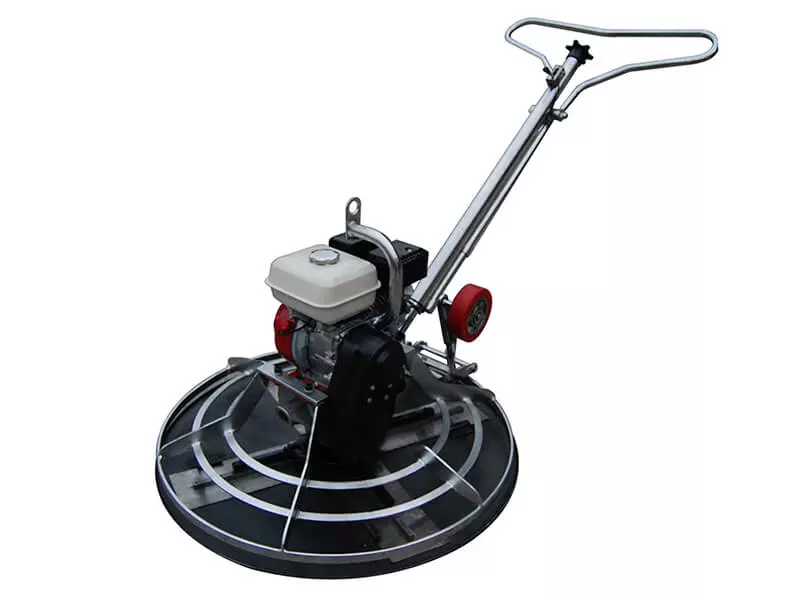
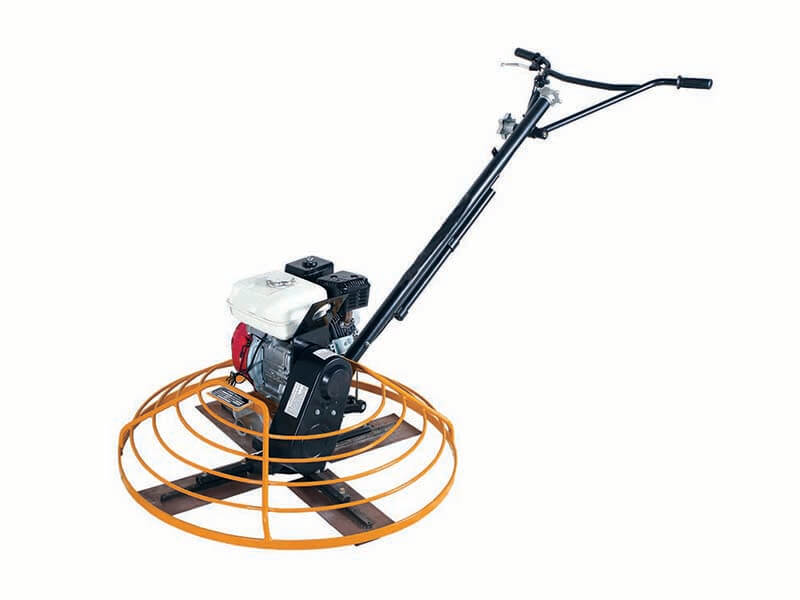
Walk-behind power floats are compact and ideal for medium-sized areas or tight spaces, with the operator guiding the machine from behind.
Ride-on power floats are larger machines designed for wide surfaces such as warehouses and commercial floors, allowing the operator to sit and control the unit.
Both types greatly reduce labor and finishing time. Compared to hand troweling, power floating is more efficient, improves surface strength and durability, and produces a smoother, more consistent finish with fewer imperfections. This makes power floats a dependable solution for achieving high-quality, long-lasting concrete surfaces.
Proper preparation and correct timing are essential for achieving a smooth and durable concrete finish. Rushing the process or skipping steps can lead to surface marks, weak areas, and uneven results.
Always wear proper PPE, including steel-toed boots, gloves, safety glasses, a dust mask, and hearing protection. When using ride-on power floats, be aware of carbon monoxide hazards and never operate them indoors without adequate ventilation.
Before starting, make sure the dead man's switch is working correctly. Check fuel or electrical connections, and ensure all blades and pans are clean, secure, and properly installed. Test the controls and blade pitch adjustments to confirm smooth operation.
Clean the concrete surface and remove any debris. Level the concrete carefully to prevent high or low spots. Use a high-quality concrete mix suitable for the required strength and finish, and check its consistency before pouring. Pour the concrete evenly and compact it well to remove air pockets. Proper screeding is necessary to achieve a flat surface before power floating.
Timing is critical when power floating. Always wait for bleed water to evaporate before starting. Beginning too early can tear the surface and cause the machine to sink, while starting too late makes smoothing difficult and can result in an uneven finish. Use the footprint test by stepping on the concrete — if the footprint remains lightly visible at about 3 to 5 mm deep, the concrete is ready. It should be firm enough to support the power float machine while still soft enough for the blades to smooth the surface without damage.
Achieving a professional concrete finish involves more than simply running a concrete power float across the surface. Each stage plays a role in compacting, smoothing, and polishing the concrete. Following the correct sequence, using proper techniques, and timing each pass carefully are essential for a smooth, durable, and visually appealing result.
The first pass forms the foundation for the entire finishing process. It levels the surface and prepares the concrete for further refinement.
Equipment setup: use a float pan or float blades. Set the blade pitch nearly flat at about 0 to 5 degrees to prevent digging into the concrete. Make sure the machine is clean and free of debris.
Objective: level the slab, remove small surface imperfections, and firm the surface by bringing up fine cement paste. This step also helps close small gaps and reduce air pockets.
Best practice: move the machine slowly and evenly with consistent pressure. For walk-behind floats, walk backward to maintain control and visibility. Overlap each pass by about one-third of the blade width to prevent streaks. Work in sections and avoid staying in one spot too long, which can cause surface depressions.
This pass creates a stable, even base and allows the concrete to harden uniformly.
After the concrete has hardened slightly, the intermediate pass further refines the surface and begins the polishing process.
Equipment setup: remove the float pan if used and install finishing blades. Increase the blade pitch slightly to about 5 to 10 degrees to apply more pressure without cutting into the surface.
Objective: further compact and smooth the concrete, remove remaining imperfections, and prepare the slab for final polishing.
Best practice: gradually increase machine speed as the concrete stiffens, but avoid excessive speed that can cause swirl marks. Change direction from the first pass to ensure even coverage. Watch for soft spots or uneven areas and adjust blade pitch or speed as needed.
This stage helps create a uniform surface that is both strong and visually consistent.
The final pass delivers the finished look. At this point, the concrete should support the machine without leaving marks.
Equipment setup: use finishing blades with a higher pitch of about 10 to 15 degrees. Set the machine speed to medium or high, depending on surface hardness.
Objective: produce a smooth, polished, and reflective surface while hardening the top layer for added durability.
Best practice: overlap passes carefully to avoid burn marks or uneven shine. Keep the machine moving at all times, as stopping suddenly can leave dark marks. Inspect the surface regularly to ensure consistent smoothness and gloss. For a higher shine, make multiple passes, gradually increasing blade pitch and speed.
By the end of this stage, the concrete should be dense, smooth, and professional in appearance.
Power floats cannot reach tight areas near walls, corners, and edges. Use hand trowels or edgers to finish these sections, matching the texture and smoothness of the main surface for a consistent overall finish.
After power floating, allow the concrete to cure properly. Keep the surface moist for several days using wet coverings or liquid curing compounds. Proper curing increases strength and helps prevent cracks, dusting, and surface damage.
Once the concrete is fully cured, apply a sealant or protective coating. This extends the life of the surface, protects against stains and wear, and helps maintain a smooth, clean, and polished appearance.
Clean the power float after each use to remove concrete residue from blades and other parts. Inspect the machine for loose components, worn blades, and oil or fuel issues before storage. Regular maintenance keeps the equipment running efficiently and extends its service life.
Proper aftercare protects the concrete finish and ensures your power float remains reliable for future projects.
Cause: trapped air, excess surface water, or starting the floating process too early.
Solution: wait until bleed water has fully disappeared before floating. Use the correct concrete mix and apply light, even pressure during the initial passes.
Cause: the machine moving too fast, bouncing on the surface, or worn blades.
Solution: reduce machine speed, maintain steady control, and replace worn blades. Overlapping passes also helps create a smoother finish.
Cause: keeping the machine in one spot for too long during the final polishing pass.
Solution: keep the power float moving continuously, avoid stopping suddenly, and use the correct blade angle and speed.
Cause: poor site preparation, inconsistent concrete mix, or uneven floating technique.
Solution and prevention: clean and level the surface before starting. Maintain consistent blade angles and overlapping passes, and check the surface regularly by sight and touch during the process.
Addressing these issues early helps prevent costly rework and ensures a smooth, professional-looking concrete surface every time.
Power floats work best on flat concrete surfaces such as floors, slabs, and large patios. They are not suitable for vertical surfaces, thin overlays, or decorative textured finishes, which require hand tools.
Minor surface issues can usually be corrected with extra floating passes or hand troweling. More serious damage, such as deep gouges caused by floating too early, may require grinding, patching, or resurfacing. Most problems can be avoided with proper timing and technique.
Hand troweling can create a smooth surface, but it is much slower and less consistent on large areas. For commercial or industrial projects, power floats provide better uniformity, efficiency, and professional results that are hard to achieve by hand.
Yes, but concrete sets more slowly in cold conditions. Wait until the surface is strong enough to support the machine without sinking, which may take longer than usual. Using insulating blankets can help maintain even temperatures during curing.
Mastering power floating relies on three core principles: correct timing, proper technique, and the right equipment. When these elements come together, you can produce a smooth, durable, and visually appealing concrete surface that performs well over time and requires less maintenance.
As a professional power float manufacturer in China, BISON is dedicated to supplying reliable, high-quality power floats designed to deliver consistent, professional results. Explore our power float solutions today and take your concrete finishing projects to the next level.
inquiry form here
BISON BLOG, All the latest news and views from Bison Machinery.
what's hot?
Related Articles
Trowel machines: Introduction, types, working mechanism and buying guide how to achieve a professional finish with a power float power trowel manufacturer list what equipment do you need to pour a concrete sidewalk the complete guide to concrete helicopterRelated Products